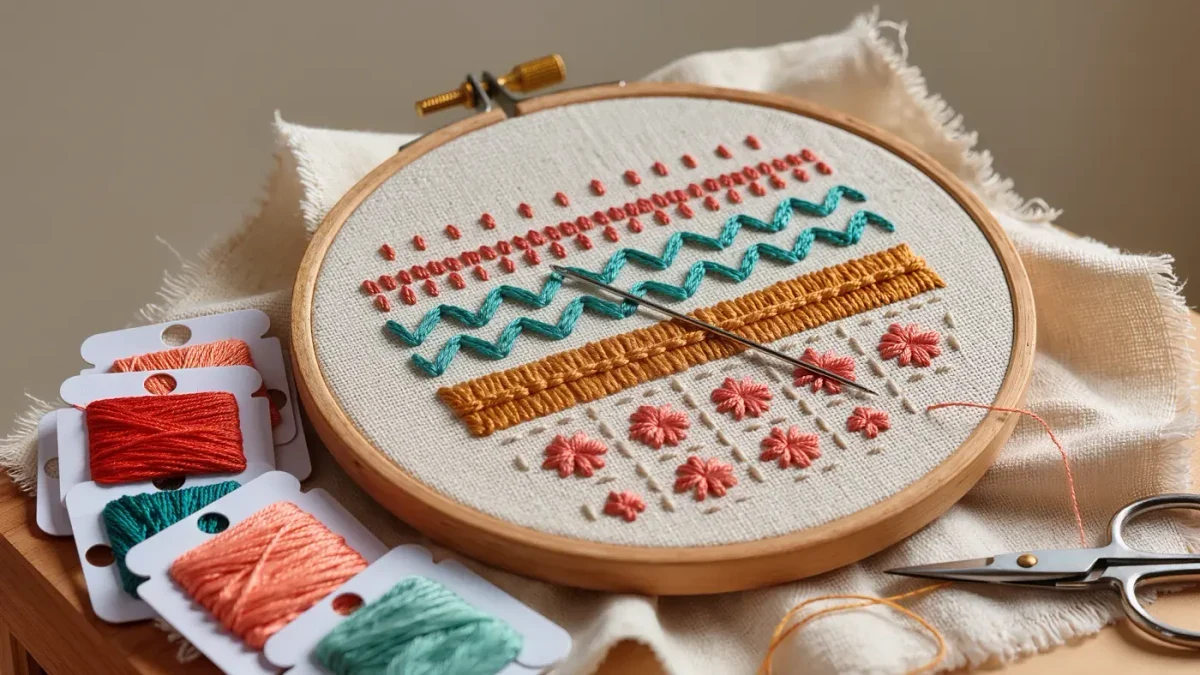
Five embroidery stitches for beginners carry almost every pattern: back stitch for outlines, stem stitch for lettering, satin stitch for filled shapes, French knots for texture, detached chain for petals. All five share one modest kit — a 15cm hoop, cotton fabric, two strands of stranded cotton and a crewel needle — and a first sampler takes a quiet weekend.
What makes these five the core five?
Nearly every embroidery pattern, however intricate it looks, resolves into four operations: a line, a letter, a filled shape and a texture. Back stitch and stem stitch between them draw every line ever printed; satin stitch fills any enclosed shape from petal to punctuation; French knots and detached chain add the raised dots and loops that make flowers read as flowers. Learn these five and a page of instructions stops being a list of unknowns.
The stitches also share one habit worth building early: stripping the thread. Cut lengths around 45cm, separate the six strands into singles, and recombine the number needed — usually two. The strands realign side by side instead of twisted, and every stitch sits broader, glossier and smoother. It is the single highest-return habit in hand embroidery, and it costs thirty seconds. The craft's long history, from opus anglicanum to contemporary textile art in the BBC Culture archive, rests on the same small repertoire. tutorials coverage.
Transferring a pattern is simpler than most beginners fear. A water-erasable pen draws directly onto light fabric, a bright window turns any printed pattern into a traceable template, and for dark cloth a chalk pencil does the same work. Mark lightly — the lines are scaffolding, not part of the finished embroidery. Hoops also travel well, which is why stitch samplers are the classic companions of trains and waiting rooms.
What does a beginner's embroidery kit need?
Everything fits in a sandwich bag:
- One 15cm wooden or bamboo hoop
- One 30cm square of medium-weight cotton or linen fabric
- Three shades of six-strand embroidery cotton
- A packet of crewel needles, sizes 7 to 9
- Small, sharp embroidery scissors
- A water-erasable fabric pen for transferring patterns
- A needle threader, offered with no judgement whatsoever
How do you work each stitch?
- Back stitch: bring the needle up one stitch-length ahead of where the line finished, then insert it back down exactly at the end of the previous stitch. The needle always travels backwards while the line grows forwards, producing an even, unbroken outline of roughly 3mm stitches — the workhorse of pattern lines.
- Stem stitch: bring the needle up on the line, insert it a full stitch-length ahead along the line, and bring its tip up again halfway back — at the midpoint of the previous stitch — with the working thread held below the needle. Draw through and repeat. The overlapping thread builds a plaited, ropelike line that curves more gracefully than back stitch, which is why it letters so well.
- Satin stitch: fill an enclosed shape with parallel straight stitches laid edge to edge, spanning the shape from one side to the other. Work outwards from the middle of the shape, and keep individual stitches short — on larger shapes, split the fill into sections or the surface sags and snags. Even tension and even angle matter more than perfection at the edges.
- French knot: bring the needle up where the knot belongs, wrap the working thread around the needle twice, and hold the wraps flat against the fabric with your thumb. Insert the needle a thread or two away from where it emerged — never the same hole — and draw through slowly, keeping the tension until the wraps settle into a firm, fat berry of a knot.
- Detached chain, or lazy daisy: bring the needle up at the base of a petal and hold the thread in a loop. Insert the needle back down in the same spot, then bring it up again at the tip of the petal, inside the loop, and tug gently until the loop curves into a neat teardrop. Secure it with a tiny tie stitch just outside the loop's widest point.
Which habits keep the front of the work neat?
Hoop tension is the first: drum-tight fabric makes every stitch easier and every edge cleaner, so re-tighten as the work softens. Thread length is the second — strands longer than about 45cm fray and thin before they finish, and short lengths cost nothing to cut. Starting and ending matter too: a waste knot held on the front and clipped after the first few stitches catch the tail keeps the back tidy, and weaving ends under existing stitches removes every lump from under the fabric.
The remaining habits are patience-shaped. Stitches worked slowly and evenly look better than stitches worked quickly and corrected; French knots reward holding the tension a beat longer than feels necessary; and a sampler of five wobbly rows teaches more than a perfect single motif. The tradition is generous that way — every expert hoop in every exhibition began as five hesitant lines on cotton. Turning the hoop a quarter-turn between sessions helps the hands notice uneven tension before it hardens into habit.
From this base, chain stitch, split stitch, seed filling and woven wheels all arrive as variations rather than new subjects, and pattern pages open like catalogues of things already known. A finished sampler, framed or simply kept in the sewing bag, remains one of the most useful reference objects a stitcher will ever own, consulted a hundred times without ever wearing out.